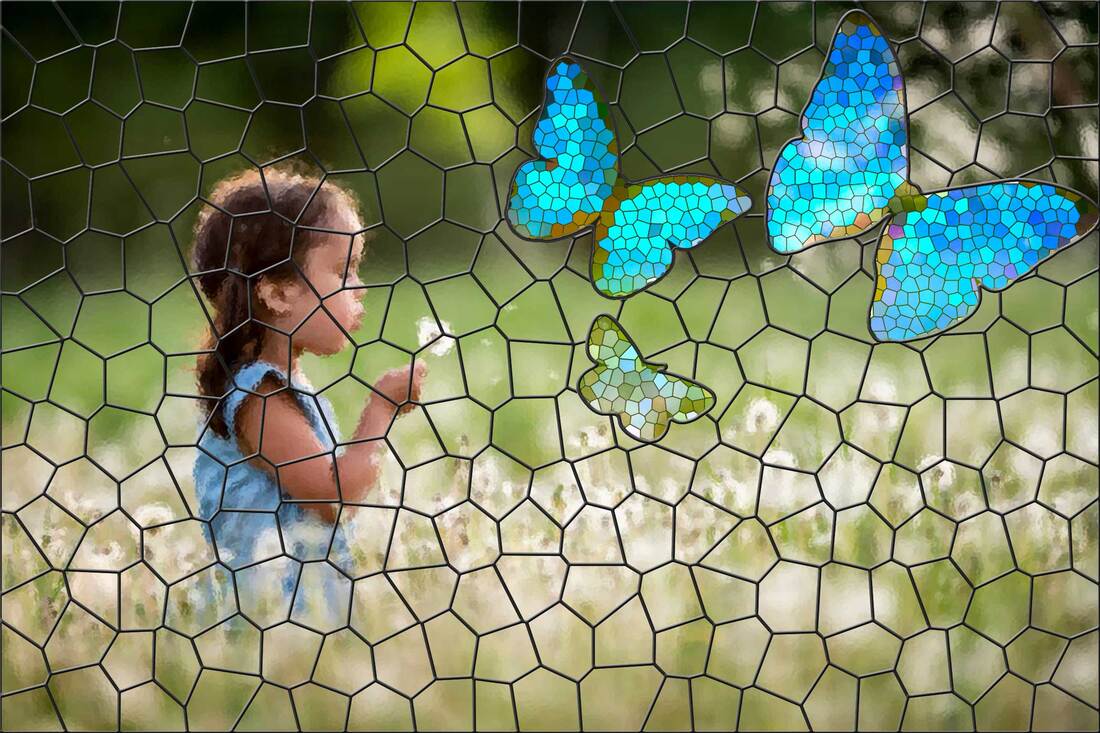
Exhibit 10 - Stained Glass Window
Design
Background: For this project I wanted to try to do something that was a little bit different from other projects that I have completed. I started out by thinking about what I know about stained glass windows and the ones that I am familiar with. When I was younger I remember going on a field trip to the Ellen Eccles Theater in Logan, Utah for a field trip, during which they explained some of the background of the building. This included explaining the story and message behind the stain glass windows. For me I feel like this is really the purpose of stained glass windows, to tell a story or message. Approaching this project I wanted to try to create a story of my own.
The image of the child blowing a dandelion is a symbol of making wishes. Butterflies have many symbols that they are associated with such as: transformation/change, growth, beauty, hope, and endurance. Together I wanted these images to give the message that the hopes and the dreams of children are the future of the world.
Contrast: Blue in the dress of the girl and the butterflies helped to make the key figures in the image stand out. The colors of the butterfly were also used to help them stand out from the background.
Alignment: Center
Repetition: The same layer adjustments and filters were used throughout the image to connect the different pieces of the image. Blue was also repeated from the background image in the Butterflies.
Proximity: The butterflies were placed close together to indicate that they were the same piece of the design.
Font: None
Color Scheme: Analogous - using greens and blues.
Photoshop:
I began by googling the an image of a child blowing dandelion and selecting the one that I wanted to use. I adjusted the resolution of the image and opened the image in photoshop. I converted the image to a smart object. Then added a Gaussian blur to the image and added a glass filter from the smart filter menu.
I added a new layer filled with white and then applied the Stained Glass texture from the Filter gallery. I then used the select color range option using the option to use the highlight to select the stained glass texture outlines. I inverted my selection to select all the white and deleted the white color to show the image beneath. I then applied a Bevel and Emboss layer to the leading layer to help it to look more realistic and add some depth to the image. I hid this layer while I place and created the top layers for the butterflies.
I then used google to find the three reference images of the butterflies and opened the images in google. For each butterfly I started with the pen tool to make a selection of the butterfly and copy it to its own layer. I then used the move and free transform to place the butterfly on the image. I then converted the image to a smart object and added a layer mask for the butterfly. I added the stained glass filter from the Filter Gallery, adjusting the settings for a smaller size image. The blend mode was changed to multiply and the stroke layer effect was used to create an outline of the butterfly. Selecting the layer mask, I was able to then use the refine mask option to smooth the leading around the image.
A new layer was added below the butterfly filled with white. To remove the color from the butterfly the smart object was opened and a white fill was placed over the image. The changes were saved for the smart object, but the layer was left open so that it could be reversed. A selection of the shape was made using the channel panel and inverting the selection. This selection was then copied to a new layer. After this change I went back into the smart object image and used the history channel to revert the image back to the original image, saved it and closed it. The colors then returned. I then applied the Bevel and Emboss settings from before and hid the white layer. The layer was changed the blend mode to Screen. I then adjusted the Hue/Saturation, brightness and contrast, vibrance using the adjustment layers and masks. These steps were repeated for each of the three butterflies.
I made a composite image of my project (without the original leading level). I used the mask layers to make the selections of each butterfly, I expanded the selection around the butterfly leading and moved each butterfly to a new layer. I hid the composite layer and activated the leading layer for the background. To help to organize the different components of this project I created groups in the layers.
Credits
The background photo for the little girl blowing the dandelion was found by googling "child blowing dandelion."
The three pictures were found by googling "light blue butterfly" and "blue butterflies."
Inspiration and direction for this project came from a youtube video created by Blue Lightning "Photoshop Tutorial: How to Transform a Photo into a Stained Glass Window!" I referred to the steps in this video to help me create this project.
