Exhibit 1 - Motivational Digital Display
Client: USU STARS - GEARUP
Design
Background: In beginning this project I began with research into the GEAR UP program to find out more about the audience that I would be designing towards. Though my research I decided that I wanted something that would be able to reach multiple age groups. Because the GEARUP program is focused on helping students prepare to be successful college students I wanted the end project to feel professional.
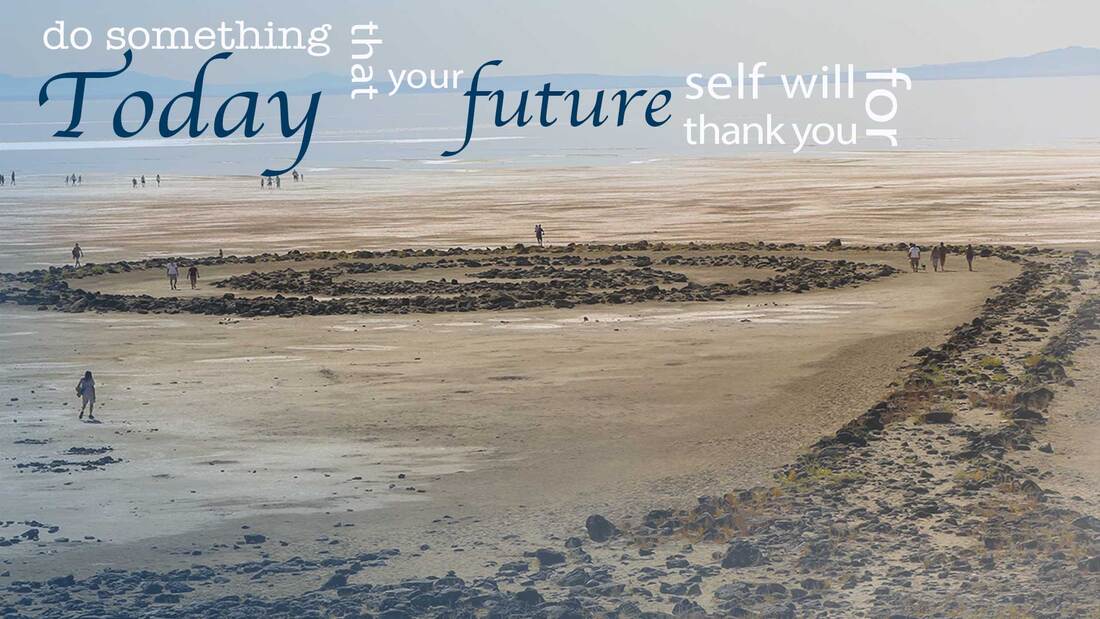
Contrast: Adjustments were made to the font size for contrast this includes size, color, and font choice.
Alignment: Text is left-aligned with the side of the image.
Repetition: Blues from the background were used for the blue of the text.
Proximity: The text layers were kept close together on the left of the image to indicate the relationship between them.
Color Schemes: Blue and whites were used from the image to help tie the image together and connect it to USU.
Font Choice: Myriad Pro (Sans-Serif font) and Apple Chancery (Script font)
Photoshop
I chose to use a photo that I had taken at the Spiral Jetty because I feel that it gives the message that success can be achieved through hard-work, self-discovery, and trying something different with what you already have. I began in Camera Raw adjusting the histogram, adding some clarity, dehazing, and adding some vibrance to reduce the whites and bring out more color in the picture. I then increased the temperature of the image to bing out the color of the sand.
I then opened this image in Photoshop and adjust the image size to meet the needed criteria,1920 x 1080 pixels at 72 dots per inch. I began with the text layers to add the quote to the image. I adjusted the size, font, and placement for each word. I started with the words being white but once I had the words in place I used the dropper tool to select a blue for the text. The text was blending into the background, so I created another layer and created a gradient of a lighter blue and white from the right corner to the left. I moved this layer to just above the background.
After receiving feedback on this project with suggestions to make the image in the background more visible as a focus point. I went back to the project and hid the gradient layer. I then resized and positioned the image so that it was easier to see the image. I then continued to work with the text so that it was no longer covering the image. I added the gradient again and added a layer mask. I used a soft brush with low opacity to paint over the spiral jetty in the layer mask to allow the natural look to show through and help the image to stand out more.
Credits
Fonts: Myriad Pro and Apple Chancery
Quote found by googling motivational sayings, found at the following https://www.success.com/17-motivational-quotes-to-inspire-you-to-be-successful/
Quote found by googling motivational sayings, found at the following https://www.success.com/17-motivational-quotes-to-inspire-you-to-be-successful/
